REAL also has a composting summary available. There are usually some print copies available at the REAL Deal Store.
Why Compost
How? An 8 Step Guide
What to Compost
Neat Tips
Troubleshooting
When to Harvest Your Gardener’s Gold
Use Your Gardener’s Gold
- It’s easy
- Saves money on garbage fees and cuts your garbage by one-third
- Your garbage won’t smell
- Produces Gardener’s Gold – the best fertilizer possible for your plants and lawn
- Cuts fertilizer costs
- Reduces production of the greenhouse gas methane from landfills by keeping wet, organic materials out.
- Protects groundwater by keeping wet, organic materials out of landfills.
- Reduces greenhouse gas production from transportation of garbage
How? The time-crunched person’s 8-step guide to easy composting
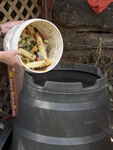
1) Get a small stainless steel bucket to collect kitchen scraps.
Plastic containers retain odours. Line the container with newspaper or old paper bags. These are a source of carbon so they absorb odours in the container and add important carbon to the compost pile. Bonus – they make the container easier to keep clean. Or, keep your collection container in your freezer.
2) Get or build a composter.
Check your local municipal office for subsidized composters or build one from old wood pallets.
3) Set up your composter so it is easily accessible and in the sun.
Follow the old adage “Put the wood pile between the outhouse and the house, and no one has an excuse for not bringing in fire wood!” Put your composter where it will be easy for you to frequently dump your kitchen scraps, especially in winter.
4) Roughen up or t urn the soil in the location where the composter will be.
This will help the compost workers, the soil bacteria and fungi, come up into the compost pile.
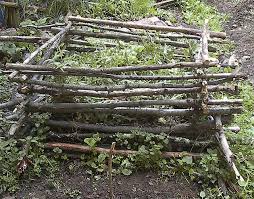
5) After placing the composter, cover the floor with a layer of small branches.
This will allow for air movement and drainage.
6) If available, add a little “finished” compost, garden soil or a compost starter (available at most garden centres) to the pile.
This helps speed up the start of the composting process.
7) Throw in your kitchen scraps!
8) Collect bags of leaves in the fall and prop them against the composter. Every time you throw a container of kitchen scraps in, add a handful or two of leaves.
This keeps the carbon/nitrogen mix in balance. Bonus – no leaves to go in leaf pickup and the bags held insulate the compost pile.
 From the Kitchen…
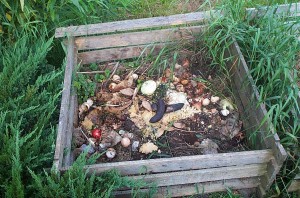
Fruit scraps
Vegetable trimmings
Egg shells (dried out)
Tea bags
Coffee grounds with filters
Shredded paper
From the Garden…
Leaves (dry, not clumped. If you have time, chopped to speed their breakdown)
Grass (not wet or clumped)
Plants and weeds (without ripe seeds)
Old potting soil
Soft plant stems
DO NOT include…unless you have sufficient land and enjoy wildlife:
- Meat, fish and bones
- Fats and oils
- Dairy products
- Cheese, meat or other sauces
- Wet eggshells
DO NOT include for any reason:
- Pet waste
- Plastics
- Metals
Neat Tips
 The compost pile will freeze in the winter. Keep adding your scraps though. Come the spring, just when you’re thinking you can’t add one more scrap to the pile, you’ll be needing to cut your fast-growing grass. Lightly sprinkle and mix in some fresh-cut grass. This adds a hit of nitrogen to the compost pile which will speed up the process. (Don’t put in great clumps of green grass or it will stink!)
If you have time, chop up or shred compost materials. Composting works best and fastest when pieces are small. If you want to enter the compost Olympics, try the 14-day approach.
Raccoons and other animals are particularly attracted to the wet albumen on the inside of eggshells. Let the eggshells dry out before putting them into the compost pile.Or, let them dry out, crush them and spread them around plants to keep soft-bodied insects from attacking your plants.
Don’t add thick layers of any one kind of waste . Grass should not be more than 6 cm deep, leaves up to 15 cm deep (cut or chop or dry and crumble them). If you can, let grass dry first or mix it with dry, coarse material such as leaves to prevent compacting.
The composter contents should be moist like a wrung-out sponge. If the contents are too dry, it will take overly long to compost; and if too wet, the contents may begin to smell.
If you have time, turn or mix the compost every couple of weeks or each time you add new material. This keeps the compost well aerated. With no time, just make sure you are layering kitchen scraps and garden material.
Composting can be done in the winter . You can add materials to your composter all winter long. The breakdown process slows down or stops when the pile is frozen, but it will start up again in the spring. Thorough turning in the spring will reactivate the pile. Empty the composter in the fall to make plenty of room.
Composting can be done indoors. You can use a vermicomposter to compost smaller amounts of materials indoors using worms. Great for apartment dwellers or a classroom. One local supplier is The Worm Factory in Westport.
Troubleshooting
 Composting is not difficult but sometimes the process requires a little extra attention. Here are some easy solutions to correct certain situations which might occur.
- If the pile does not decrease in size or generate heat, composting may need a boost. If the pile is dry, add water – mixing thoroughly. If the pile is wet and muddy, spread it in the sun and add dry material. Remember to save “old” compost to mix with incoming material.
- If the centre of the pile is damp and warm, but the rest is cold, the pile may be too small. Try to keep your composter as full as possible. Mix new with old, dry with wet, breaking up mats and clumps.
- If the pile is damp and sweet smelling but not heating, it may need nitrogen. Add grass clippings, table scraps or a sprinkling of organic fertilizer from the garden centre.
- If the compost pile develops a foul odour, it may not be getting enough air. Loosen up the pile, break up clumps, unblock vents and perhaps add some wood chips to help the pile “breathe”. Turning the pile always helps aeration.
- Compost in a container with a cover to prevent animals from getting into the composting materials. A wire mesh around the base can help to prevent pests from digging under the pile. Dig in or cover food waste immediately.
When to Harvest Your Gardener’s Gold
The composting process can take from 2 months to 2 years, depending on the materials used and the effort involved. To accelerate the process, the pile must be a balance between wet and dry material, turned frequently and the waste shredded or in small pieces.
Compost is ready to be used when it is dark in colour, crumbly and has an “earthy” smell. You can sift the compost to extract material which has not yet finished composting. Return this back to the pile to complete its transformation into humus.
Use Your Gardener’s Gold
Compost is the perfect slow fertilizer and soil additive. It increases the soil’s organic matter content and its moisture-holding capacity. It improves soil porosity and helps to control soil erosion. It also enhances plant and flower growth and helps plants develop a sound root structure. Use it on your lawn, in your garden, around trees or combine it with potting soil for your plants.
With information from the Composting Council of Canada.

